Scheduling a New Appointment
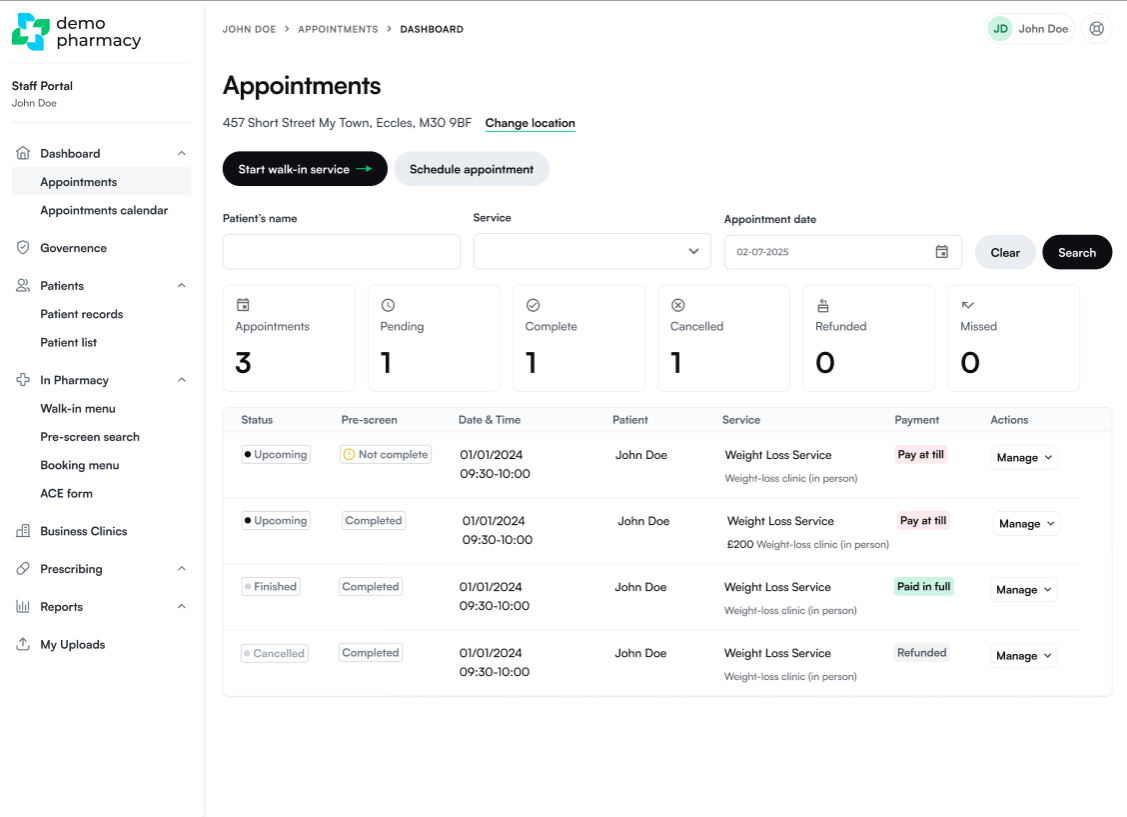
You can schedule a new clinical appointment directly from your pharmacist dashboard to book future services for both new and returning patients.
1. Initiating the Booking
There are two quick ways to start scheduling an appointment from your pharmacist interface:
- From the Dashboard: Click the Schedule appointment button on the main action panel.
- From the Calendar: Navigate to your schedule and click directly on the specific time slot where you want to place the booking.
2. Service Type & Location Checks
- Select Service Type: When prompted, choose whether you are booking a PGD Service (including custom service variations) or a Prescribe Service (if your account has this add-on active). For standard clinical workflows, select PGD Service.
- Verify Pharmacy Location: Check the top of the appointment page to confirm the correct pharmacy branch is displayed.
💡 Location Warning: If the displayed pharmacy is incorrect, return to the main Appointments Dashboard and click Change Location before proceeding.
3. Patient Information & Pre-Screen Optimisation
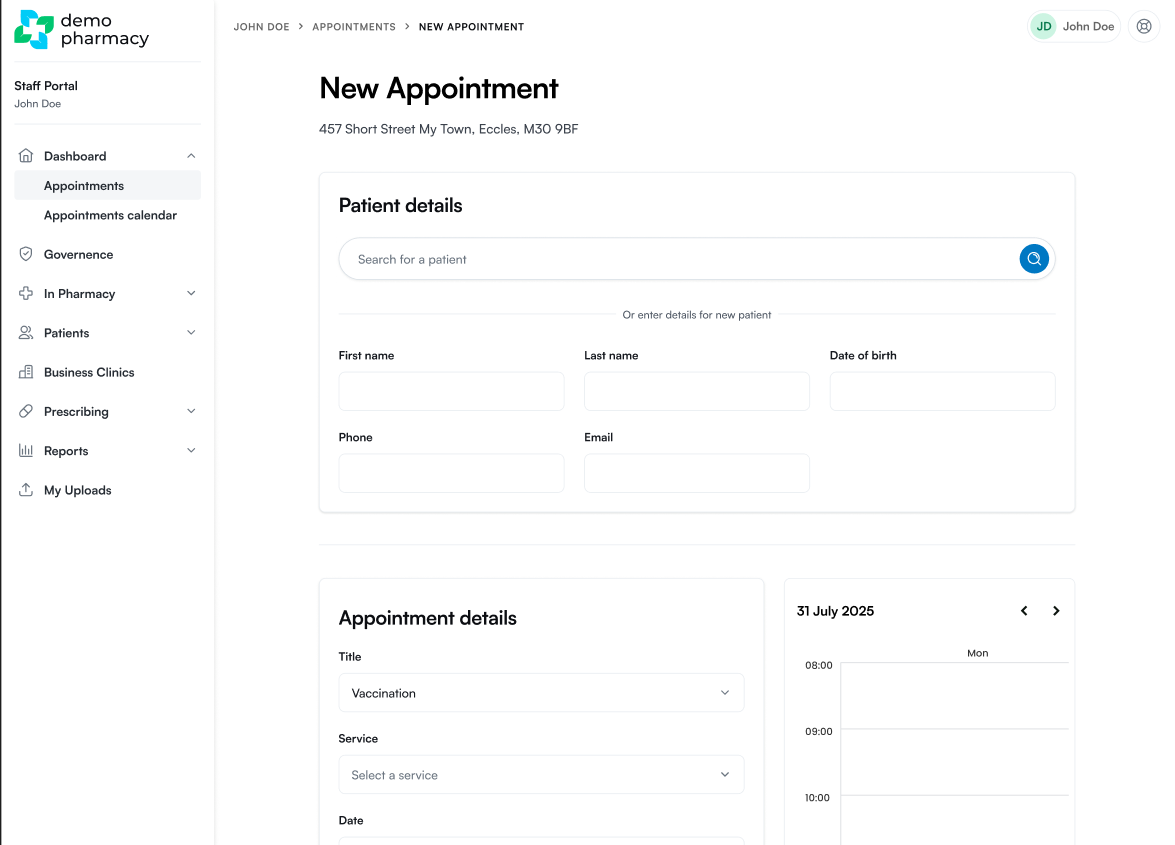
Choose one of the following patient entry methods:
Option A: Returning Patients (Recommended)
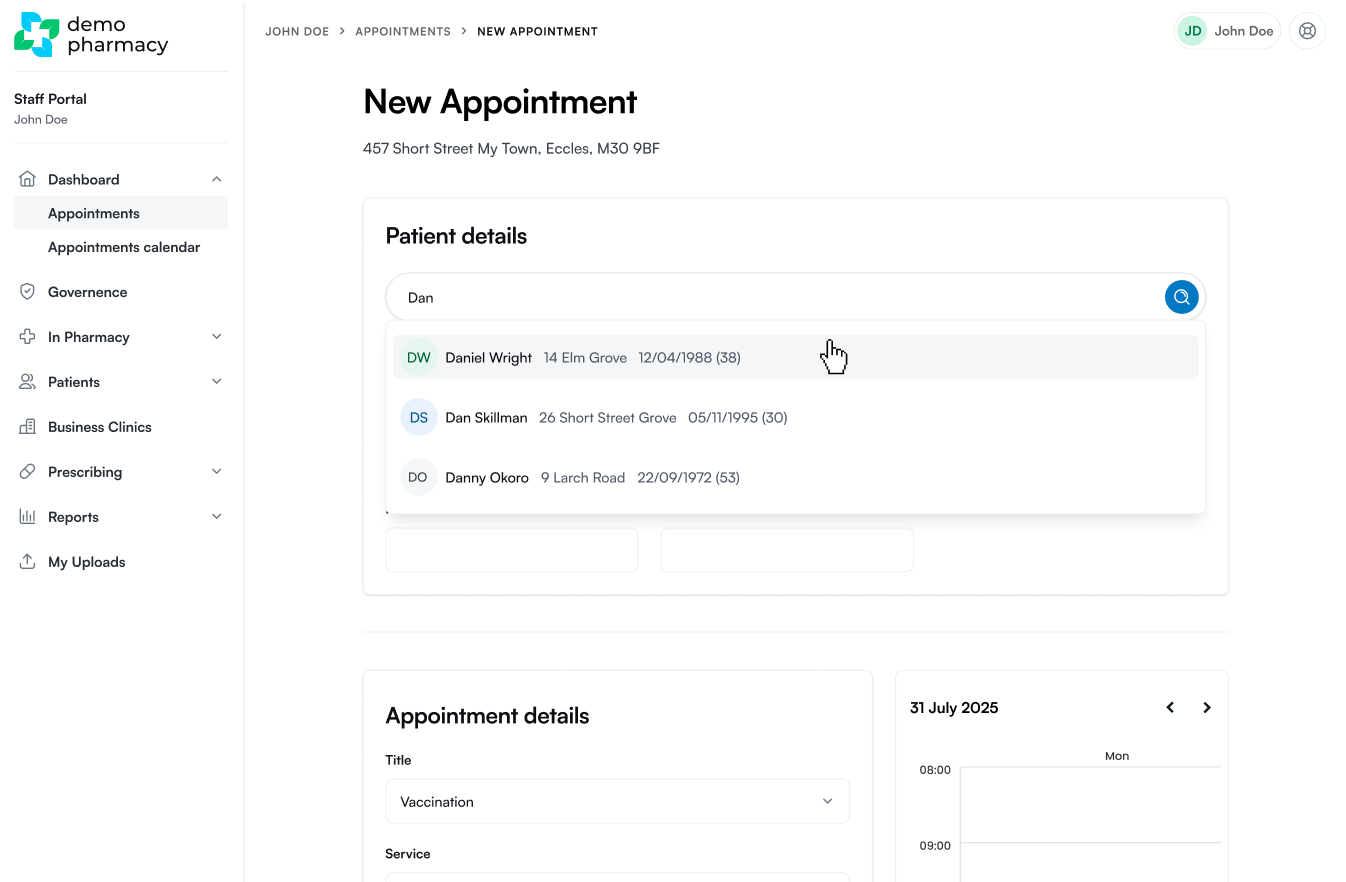
If the patient has visited your pharmacy previously, search for their name using the search bar. The preview will display their:
- Full Name
- First line of address
- Date of Birth
- Email Address & Phone Number
Verify these details with the patient and select their profile.
⚡ Why Search Past Patients? Searching and selecting an existing patient profile automatically transfers their historical demographic data and prior consultation details into the new appointment. This saves significant time during the medical pre-screen process.
Option B: New Patients
If the patient is visiting for the first time, manually complete the primary contact fields:
- Full Name
- Date of Birth
- Phone Number
- Email Address
4. Setting Appointment Time & Availability
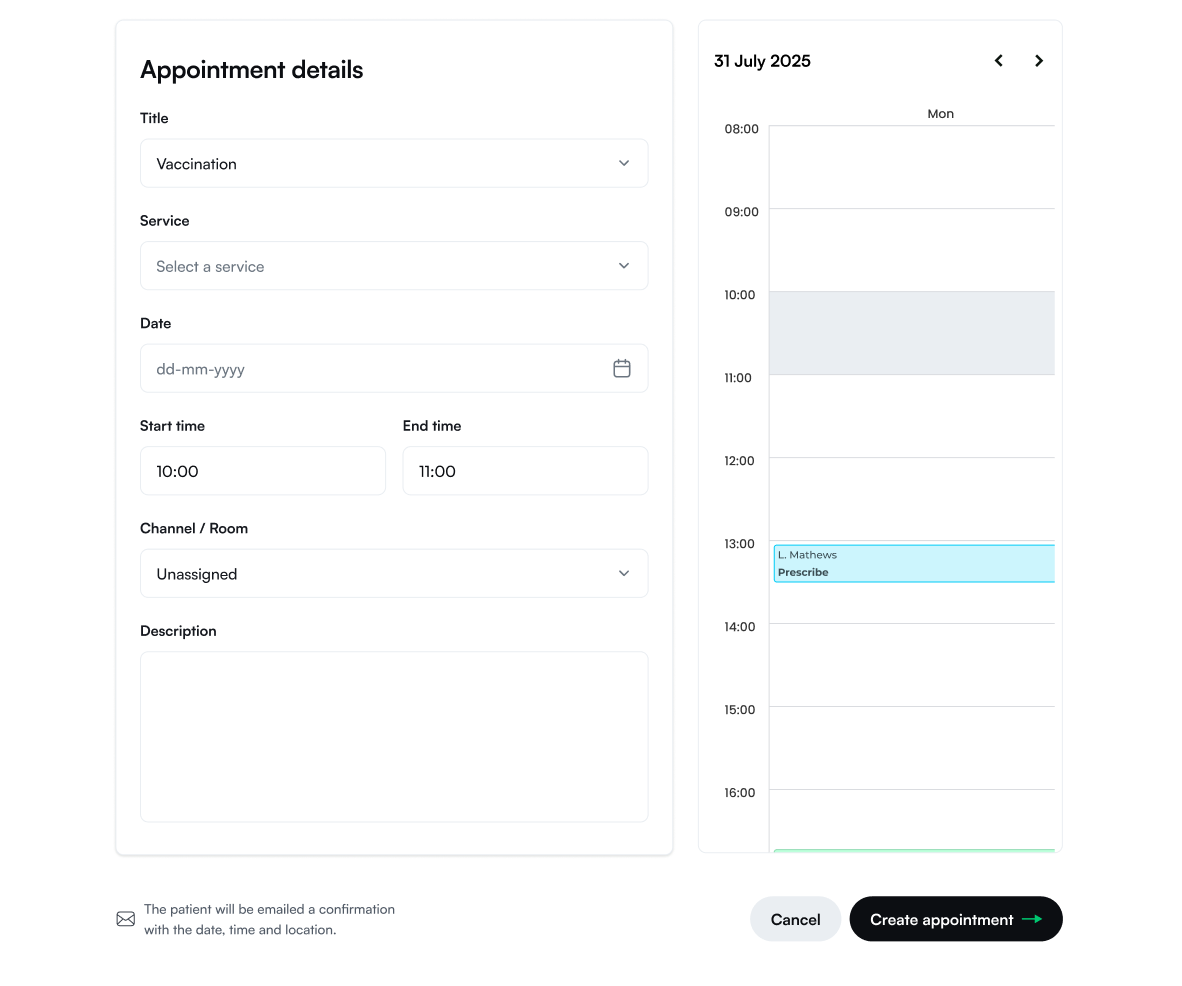
- Complete the core appointment fields, including the service type and date.
- Use the Calendar Preview panel on the right-hand side of the screen to view live branch availability.
- Click directly on an available time slot within the preview panel to set the start time automatically.
5. Finalising the Appointment
- Review all appointment and patient details for accuracy.
- Click Create Appointment.
Once created, the appointment instantly populates on your branch schedule. The system automatically sends an email confirmation to the patient containing their booking details and a secure link to complete their digital medical pre-screen prior to their visit.