Pharmacy Management
As a Head Office user, you have centralised control over the details, configuration, and access levels for all your pharmacy branches.
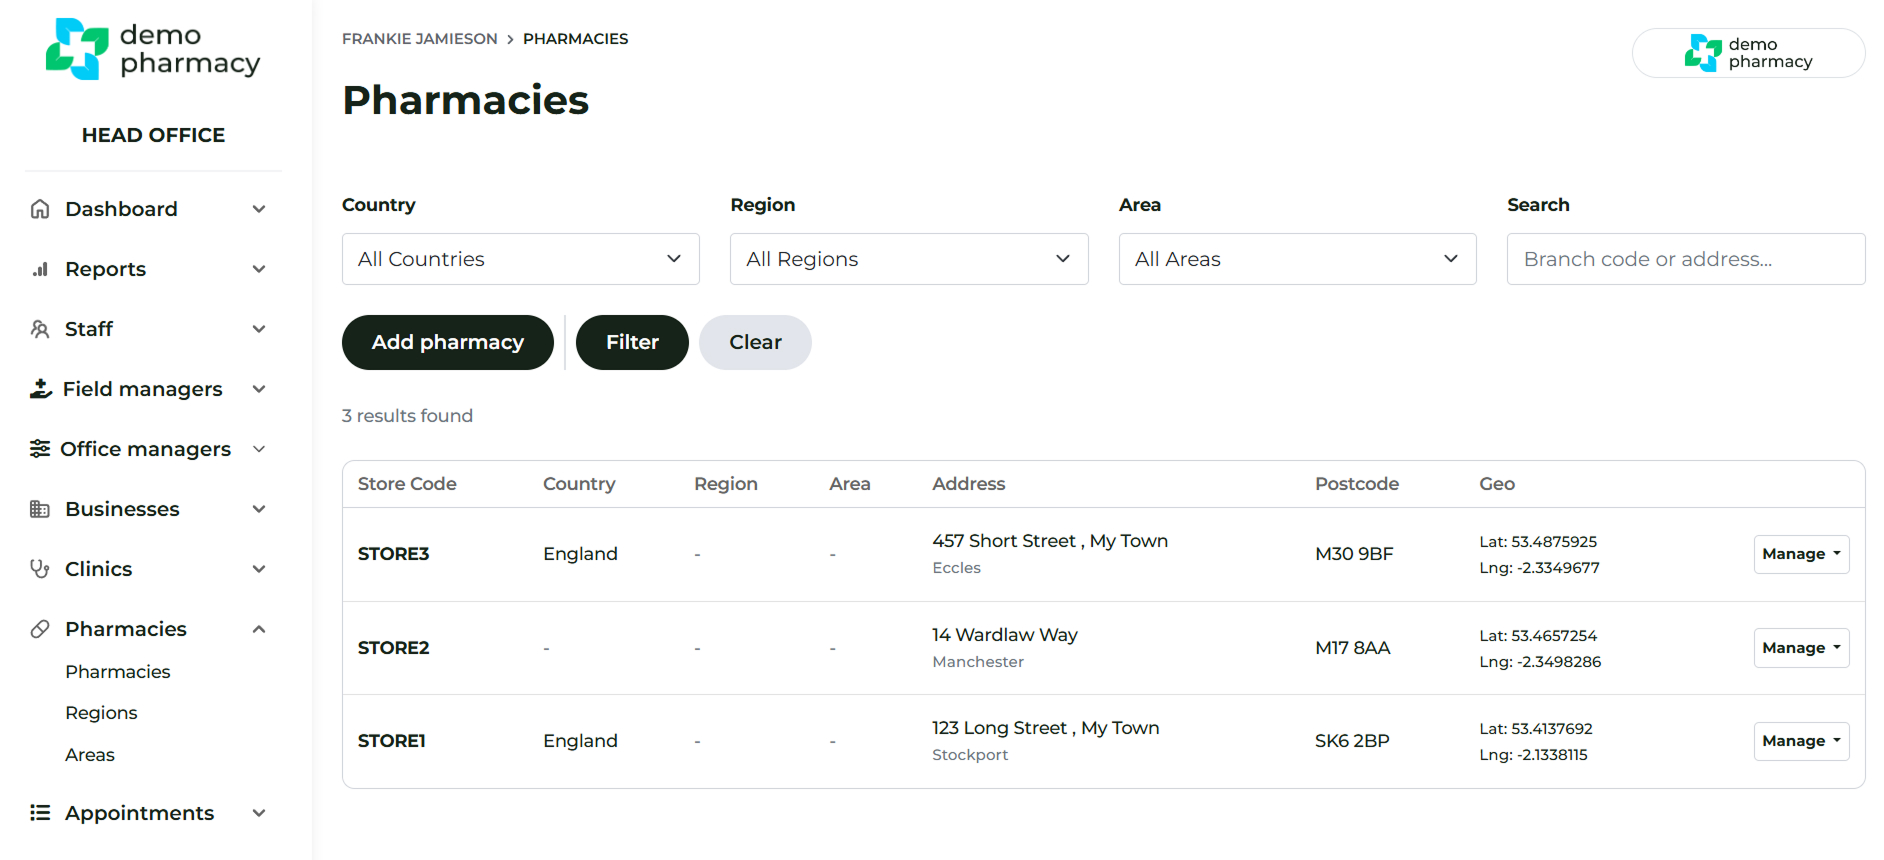
Step 1: Accessing Pharmacy Details
To access the pharmacy management screen, navigate to Pharmacies > Pharmacies.
From here, you can perform primary actions:
- Search for an existing pharmacy.
- Add a new pharmacy to your group.
- Edit the details of an existing pharmacy.
Keeping your Pharmacies & Service Providers up to date
Adding a New Pharmacy
To add a new location to your group:
- Click on ‘Pharmacies’ in the main navigation.
- Click the ‘Add Pharmacy’ button.
- Ensure all required fields are completed accurately. Seek support from your Deltera contact if required during this process.
- Important: Once the pharmacy is added, you must notify your account contact so that the account and payment amounts can be officially updated.
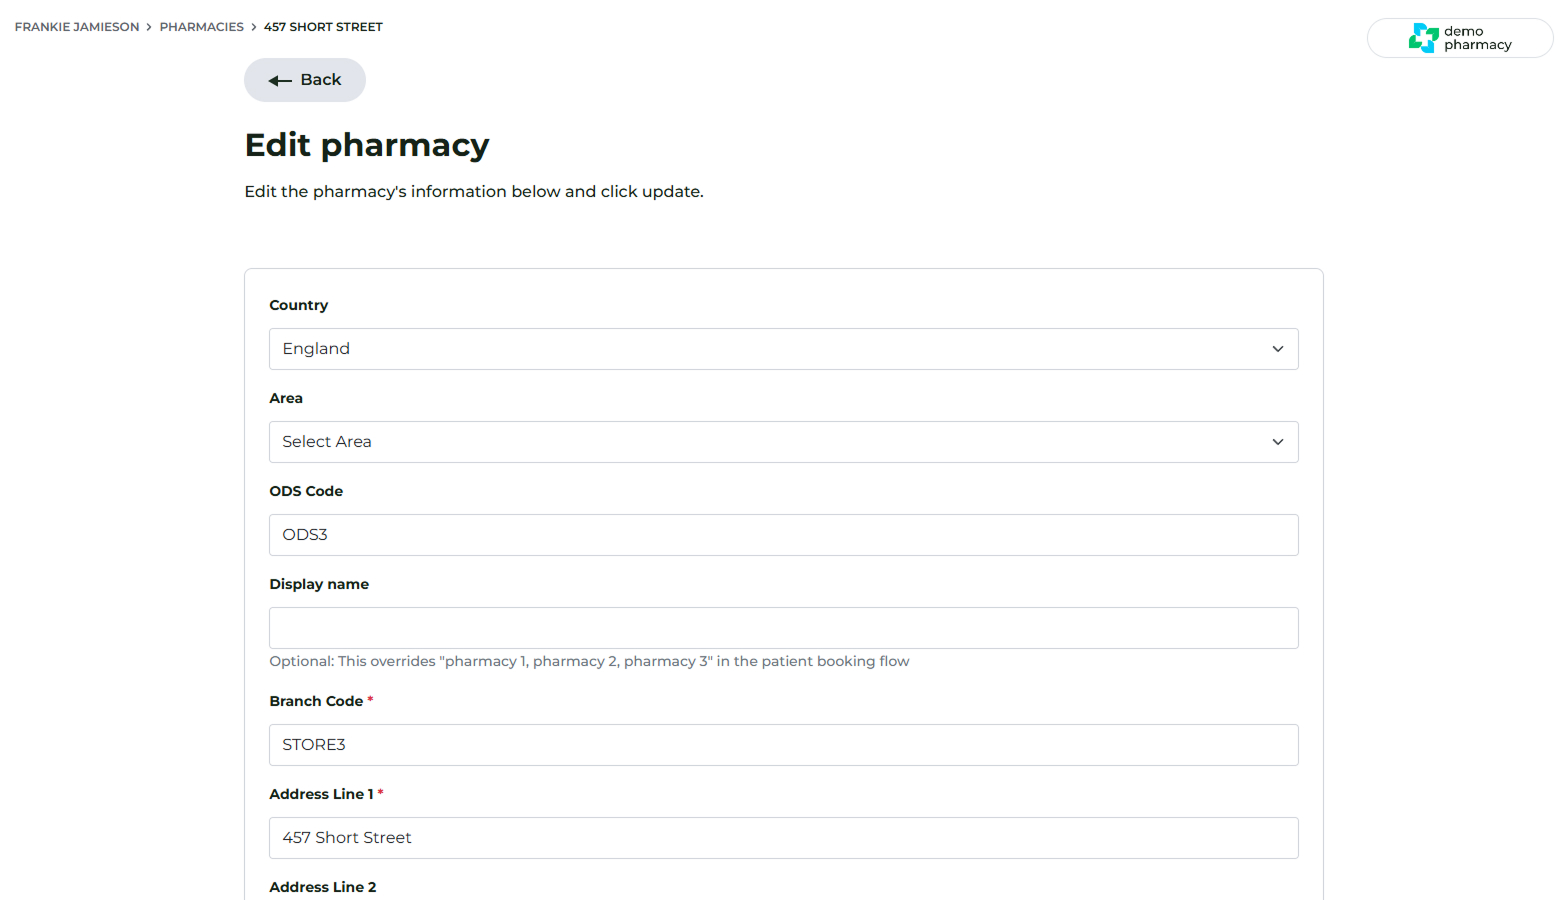
Step 2: Editing Pharmacy Details and Dependencies
To modify the details of a specific branch, you must enter the Edit Pharmacy page.
- Click 'Manage' on the target pharmacy.
- Click 'Edit'.
On the Edit Pharmacy page, you will manage core information and related dependencies:
- Details: Ensure all core details (e.g., address, contact information) are kept up to date.
- Dependencies: Manage related settings such as Opening hours.
- Saving Changes: After making any modifications, ensure you click 'Update' at the bottom of the page to save your changes.
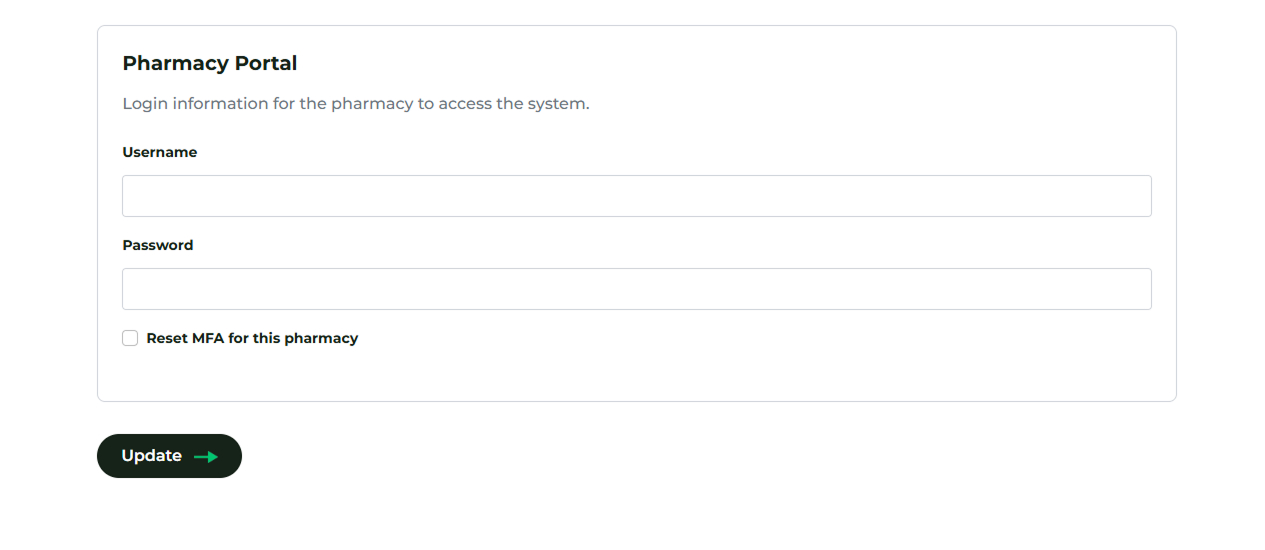
Step 3: Creating Shared Accounts for Non-Clinical Staff
You can create a shared, pharmacy-level login specifically for non-clinical staff (e.g., counter staff) that limits their access.
- Access: This function is available within the Edit Pharmacy page.
- Pharmacy Portal Login: Add a Pharmacy Portal login for the branch.
- Functionality: Staff using this login can view appointments but are restricted from starting or completing clinical consultations.
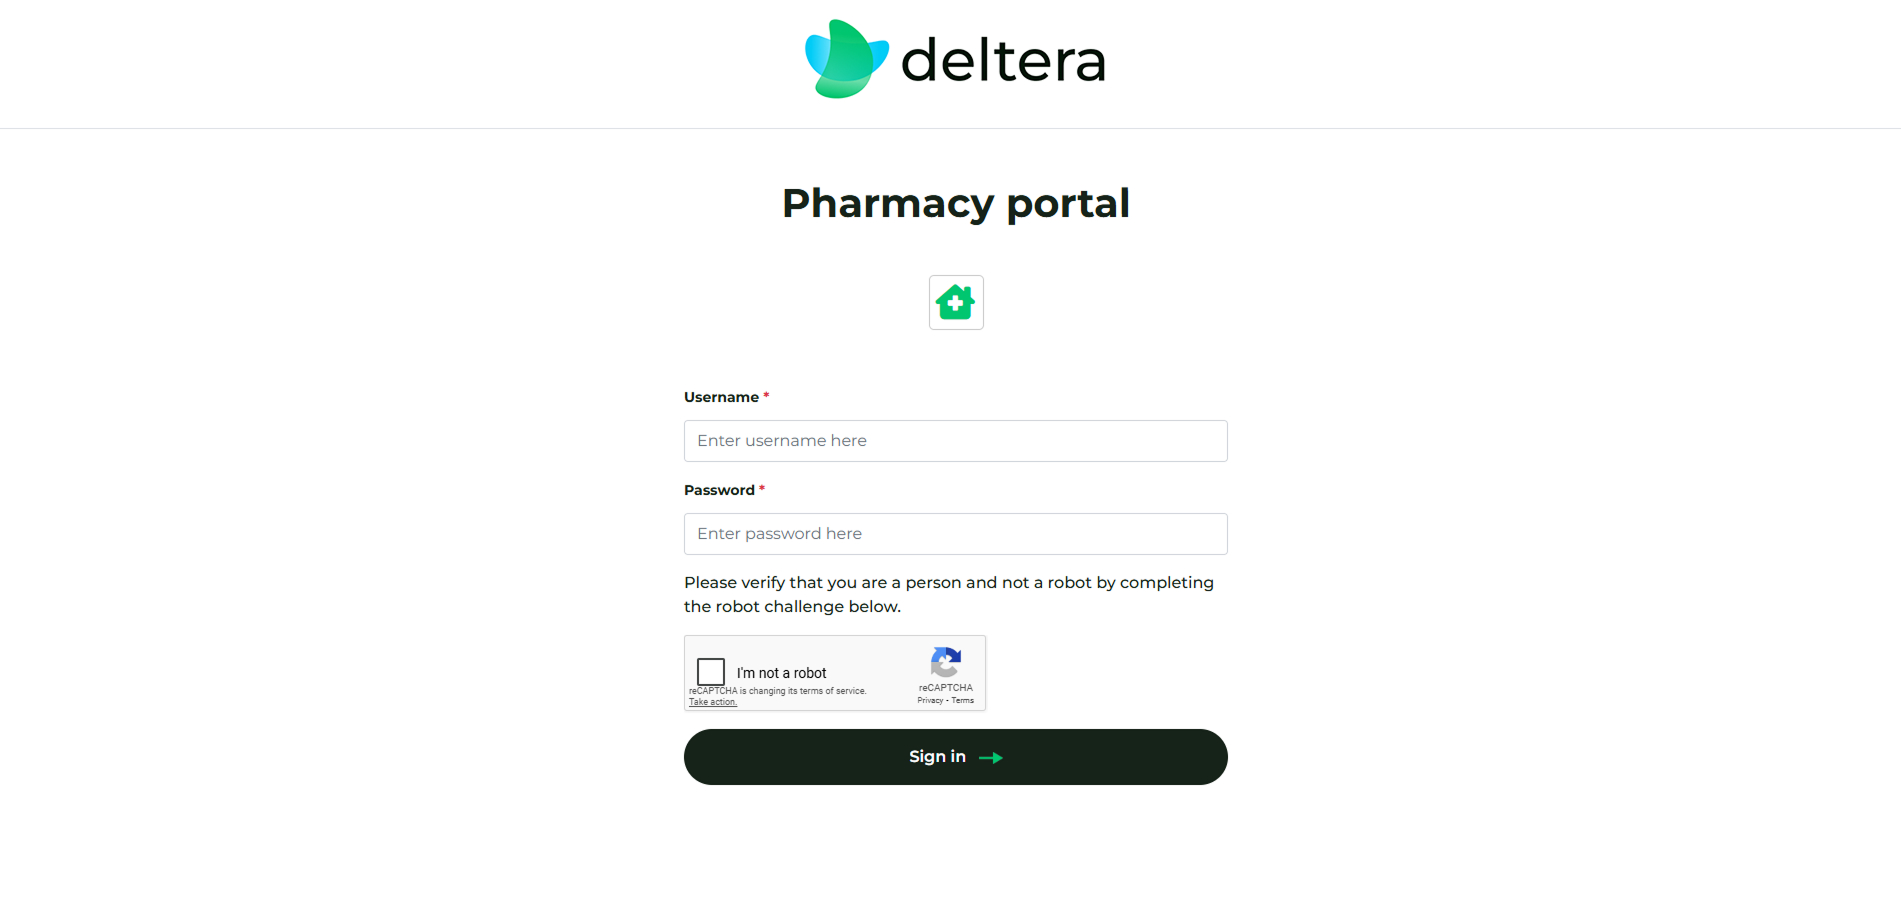
Signing In to the Pharmacy Portal
Non-clinical staff access the portal using the dedicated login created above.
- Access the sign-in page by clicking the icon on the branch's computer, or via the web link:
https://deltera.cloud/pharmacy. - MFA Setup: The first time staff sign in on a new device, they must configure Multi-Factor Authentication (MFA). The system will provide a unique, time-based code (e.g.,
547 528). - Staff must enter this code into the box shown and click the Enable MFA button.
MFA Challenges and Subsequent Logins
MFA is now configured on that device. If staff attempt to sign in using a different console in the branch or any other location, they will receive an MFA challenge:
- Action: Enter the new time-based code into the field shown and click Verify to submit the challenge code.
Managing Appointment Availability
Maintaining accurate availability is essential for preventing booking conflicts and ensuring that your patients only see slots when a qualified pharmacist is actually available to treat them.
Pharmacy Opening Hours
The opening hours you set within the Edit Pharmacy section are the "master switch" for your availability. The system uses these timings to provision appointment slots for your patients.
- Accuracy: If you do not provide appointments beyond a certain time—either daily or on specific days—you must adjust your timings here.
- Format: Please ensure all times are entered in 24-hour format (e.g. enter 19:00 for 7pm).
Using the Appointment Calendar to Refine Availability
While your opening hours set the general boundaries, you can use the Appointment Calendar to manage day-to-day fluctuations or specific pharmacist rotas. By left-clicking on any slot in the calendar, you can create two types of events:
1. Break Events
A 'Break' event acts as a total block. Use this to hide all availability for a specific period (e.g. for lunch breaks or staff meetings). No services can be booked by patients during a Break event.
2. Limited Services Events
This tool offers more granular control and is ideal for managing pharmacist rotas or specific clinic days.
- How it works: When you create a Limited Services event, you can specify exactly which services remain available for booking during that window. All other services will be hidden from patients.
- Recurrence: You can set these as recurring events (e.g. every Friday) and even set a specific end date.
- Clinical Rota Example: Imagine you have a pharmacist, Dan, who works every Friday but only provides Weight Management services. You would create a recurring Limited Services event for Fridays, ticking only the 'Weight Loss' services. This ensures a patient doesn't accidentally book a Travel Vaccination when there isn't a qualified pharmacist on-site to deliver it.
💡 Staff Tip: Using 'Limited Services' is the best way to "protect" your specialists. It allows you to advertise your pharmacy as open, while ensuring the right pharmacist is matched with the right patient request.
Managing appointments in the Pharmacy account
This article shows how to manage appointments and configure the calendar