

Your Appointments Dashboard
The Dashboard is the first screen you see after signing in. It lists every appointment and event for your pharmacy, grouped by day, so you can see what's coming up, start consultations and manage bookings from one place.
Watch this one-minute tour of the new dashboard:
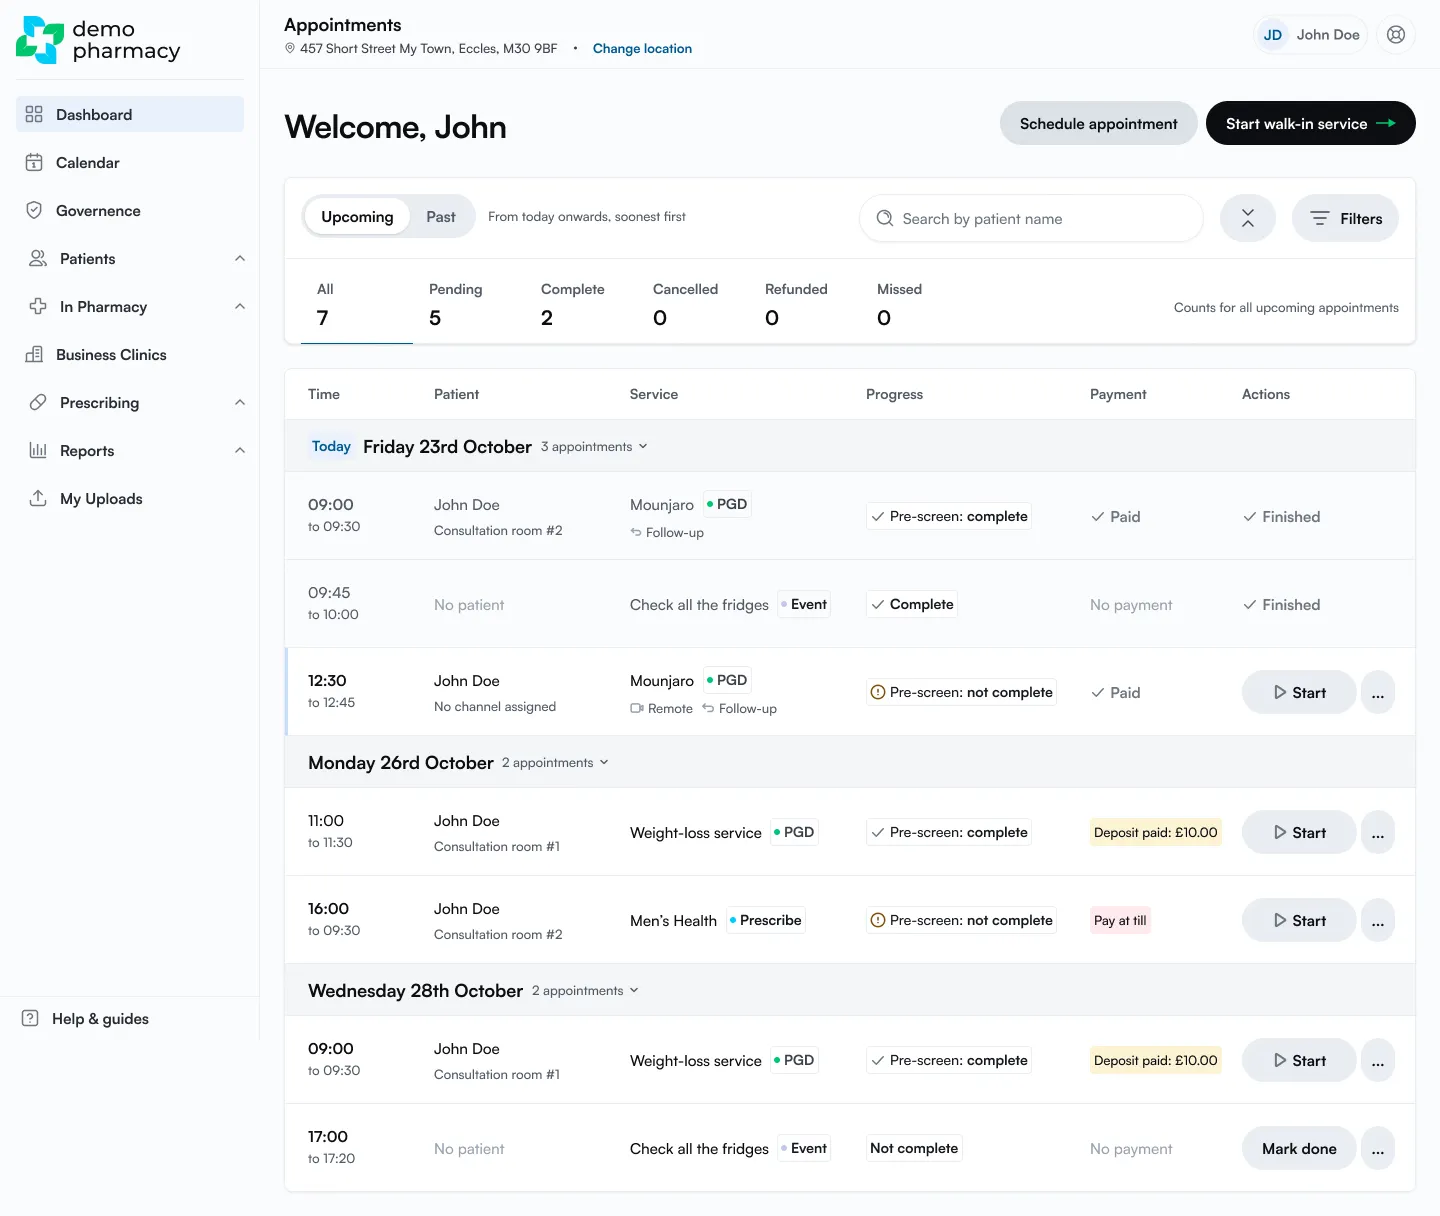
The top of the page
Section titled “The top of the page”- Location: the pharmacy you are working in is shown under Appointments. If it’s wrong, click Change location. Everything on the dashboard is for this pharmacy, not just your own bookings.
- Schedule appointment: book a future appointment. See Scheduling appointments.
- Start walk-in service: see a patient who is in the pharmacy now. See Starting a walk-in service.
Upcoming and Past
Section titled “Upcoming and Past”Use the toggle at the top of the list to switch between:
- Upcoming: today onwards, soonest first. This is what you see when you sign in.
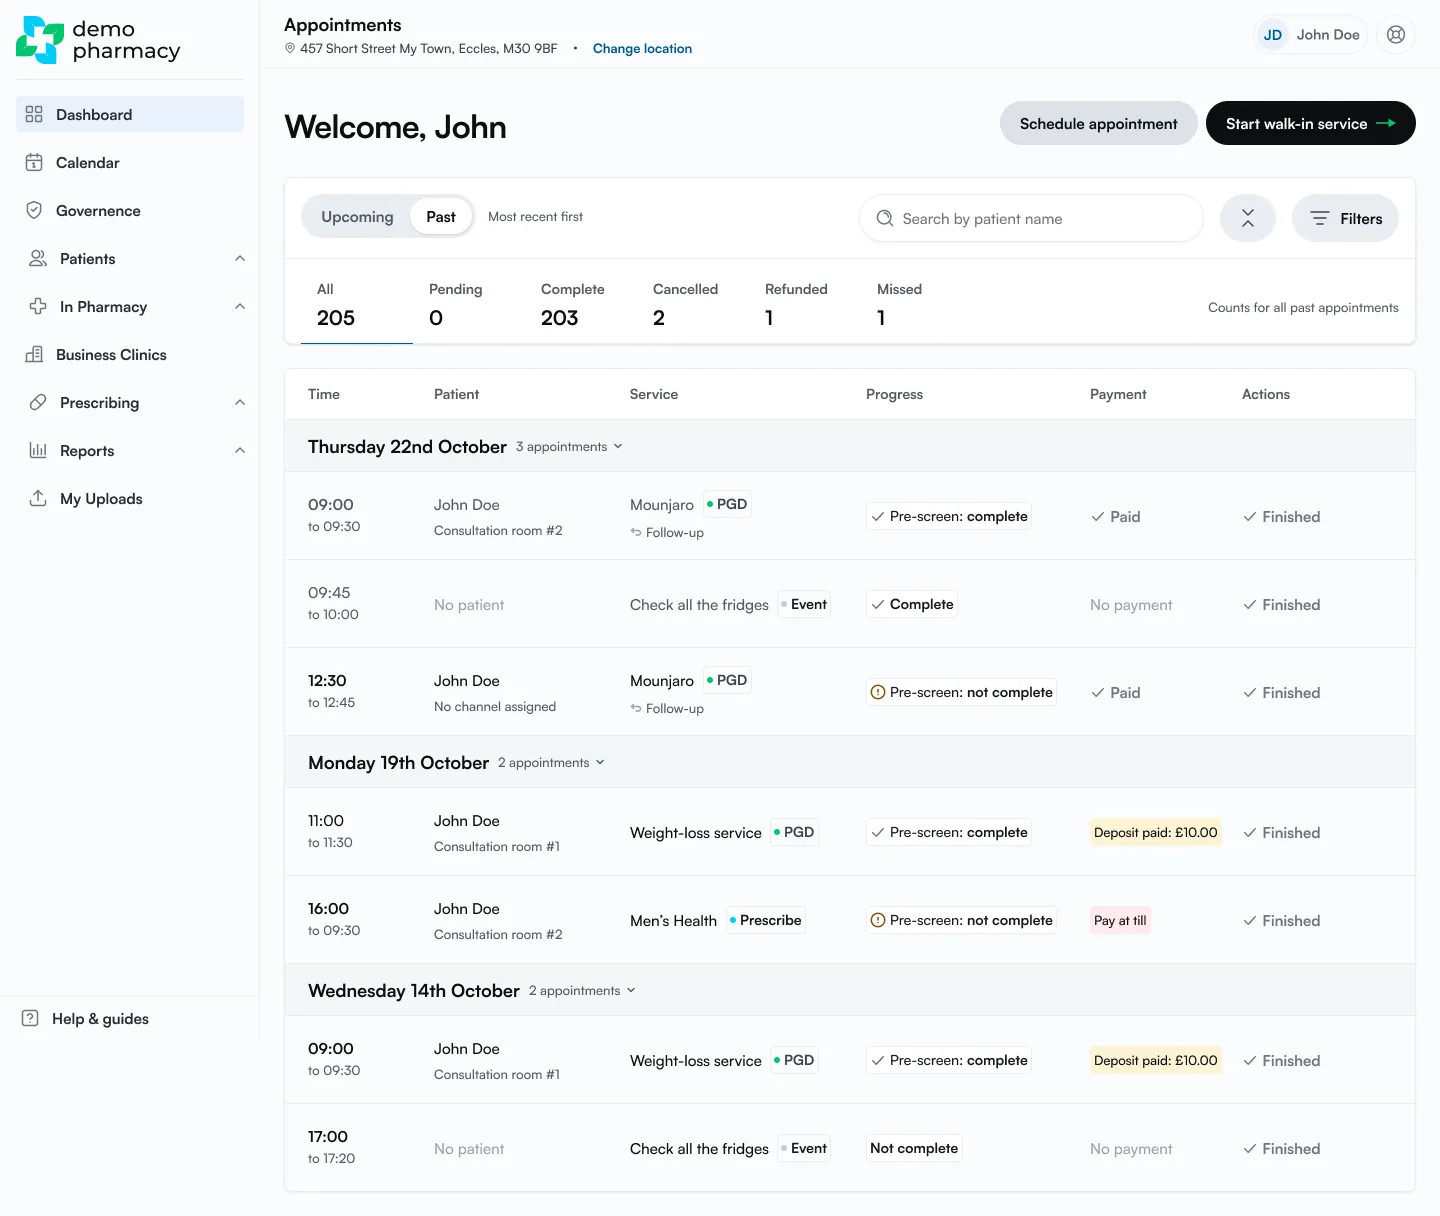
- Past: earlier appointments, most recent first.
Status tabs
Section titled “Status tabs”The tabs under the toggle show how many appointments have each status: All, Pending, Complete, Cancelled, Refunded and Missed. Click a tab to show only those appointments.
The counts are for all upcoming (or all past) appointments, so they don’t change when you search.
Searching and filtering
Section titled “Searching and filtering”- Search by patient name: type a name to narrow the list.
- Filters: click Filters to open the filter panel. Choose a Service, Channel and/or Appointment date, then click Apply filters. Click Clear to remove them.
- Expand or collapse all days: click the button with up and down arrows, next to the search box, to open or close every day at once.
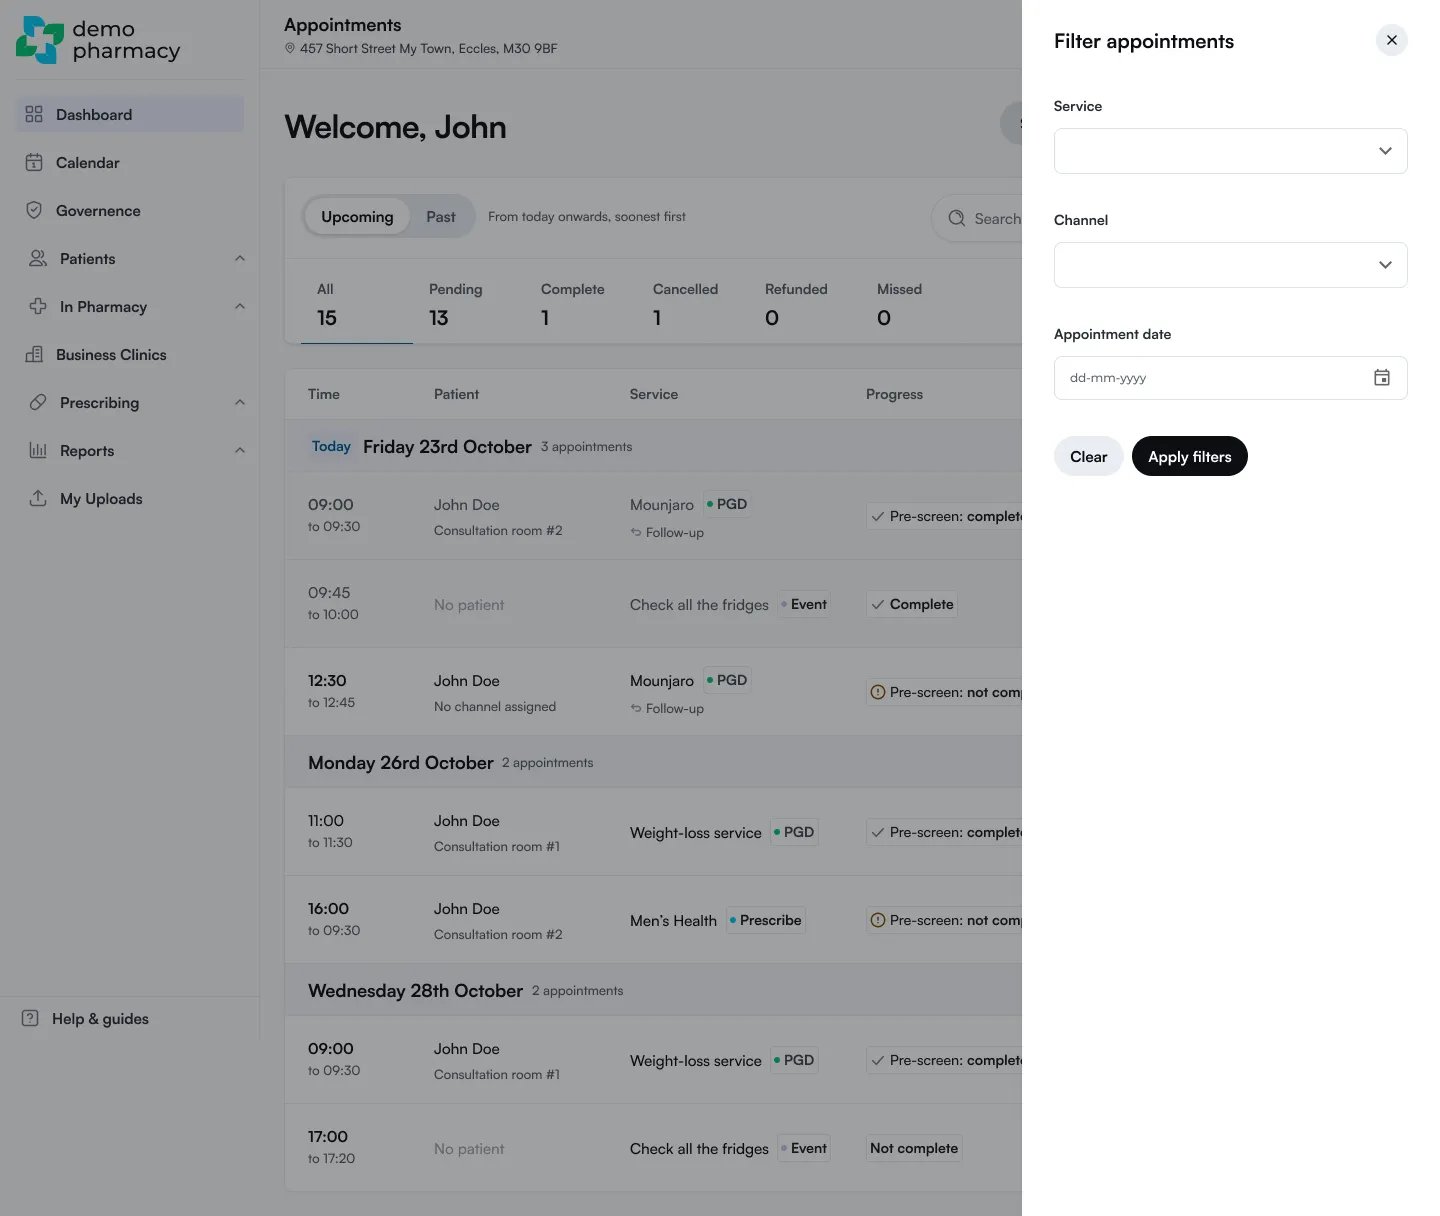
Reading the list
Section titled “Reading the list”Appointments are grouped by day. Today’s date has a Today tag, and each day shows how many appointments it has.
| Column | What it shows |
|---|---|
| Time | Start and end time. |
| Patient | The patient’s name and the channel or room they’re booked into. Events without a patient show No patient. Appointments without a channel show No channel assigned. |
| Service | The service name and its type: PGD, Prescribe or Event. Follow-up marks a follow-up appointment, and Remote marks a remote consultation. |
| Progress | Whether the patient has completed their pre-screen (Pre-screen: complete or Pre-screen: not complete). For events, Complete or Not complete. |
| Payment | For example Paid, Deposit paid: £10.00, Pay at till or No payment. |
| Actions | The buttons for that appointment (see below). |
Row highlights
Section titled “Row highlights”- Green: a consultation is in progress.
- Blue: your next appointment.
Actions
Section titled “Actions”- Start: opens the consultation. For PGD services you don’t need to wait for the pre-screen: anything missing is highlighted in the consultation for you to fill in. See Launching a consultation.
- … (more):
- Preview: look over an appointment ahead of time, for example to check the patient’s history and allergies before they arrive.
- Edit: change the date, time, service or patient details.
- Cancel: cancel this appointment.
- Start pre-screen: complete the pre-screen the old way, with the patient at the counter or on a device you hand them, before starting the consultation.
- Mark done: for events, mark the event as done.
- Finished: the appointment or event is complete. There’s nothing more to do.
Cancelling all appointments on a day
Section titled “Cancelling all appointments on a day”If you can’t run appointments on a particular day, for example because the pharmacist is off sick or a medicine is out of stock, you can cancel the whole day at once instead of one appointment at a time.
You can only cancel today or a future day. Only pending appointments that haven’t started yet are cancelled. Appointments that have already started, finished or been cancelled are left alone, and so are events such as “Check all the fridges”.
How to cancel a day
Section titled “How to cancel a day”- On the Upcoming tab, find the day.
- Click the arrow next to the number of appointments (for example 3 appointments) to open the menu. If the arrow is greyed out, there’s nothing left to cancel on that day.
- Select Cancel all appointments.
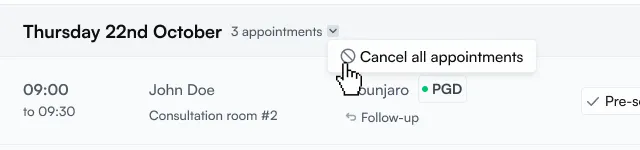
- Under Message to patients, choose a cancellation reason from the list, or type your own message. If your pharmacy hasn’t set up any cancellation reasons, there’s just the message box. You need one or the other.
- Tick I understand these appointments will be cancelled and the patients notified.
- Click Cancel appointments. To leave without cancelling anything, click Go back.
What happens next
Section titled “What happens next”- You’ll see a confirmation saying how many appointments were cancelled and how many patients were emailed. If any email couldn’t be sent, it tells you, so you can contact those patients yourself.
- Patients are emailed: each patient gets an email with the appointment’s date, time and pharmacy address, your reason or message, and a link to book again. Patients are contacted by email only, not by SMS. Patients with no email address on their booking aren’t contacted, so phone them yourself.
- Payments aren’t refunded: see Refunds aren’t automatic above.