

Scheduling a pharmacy service appointment and managing your calendar
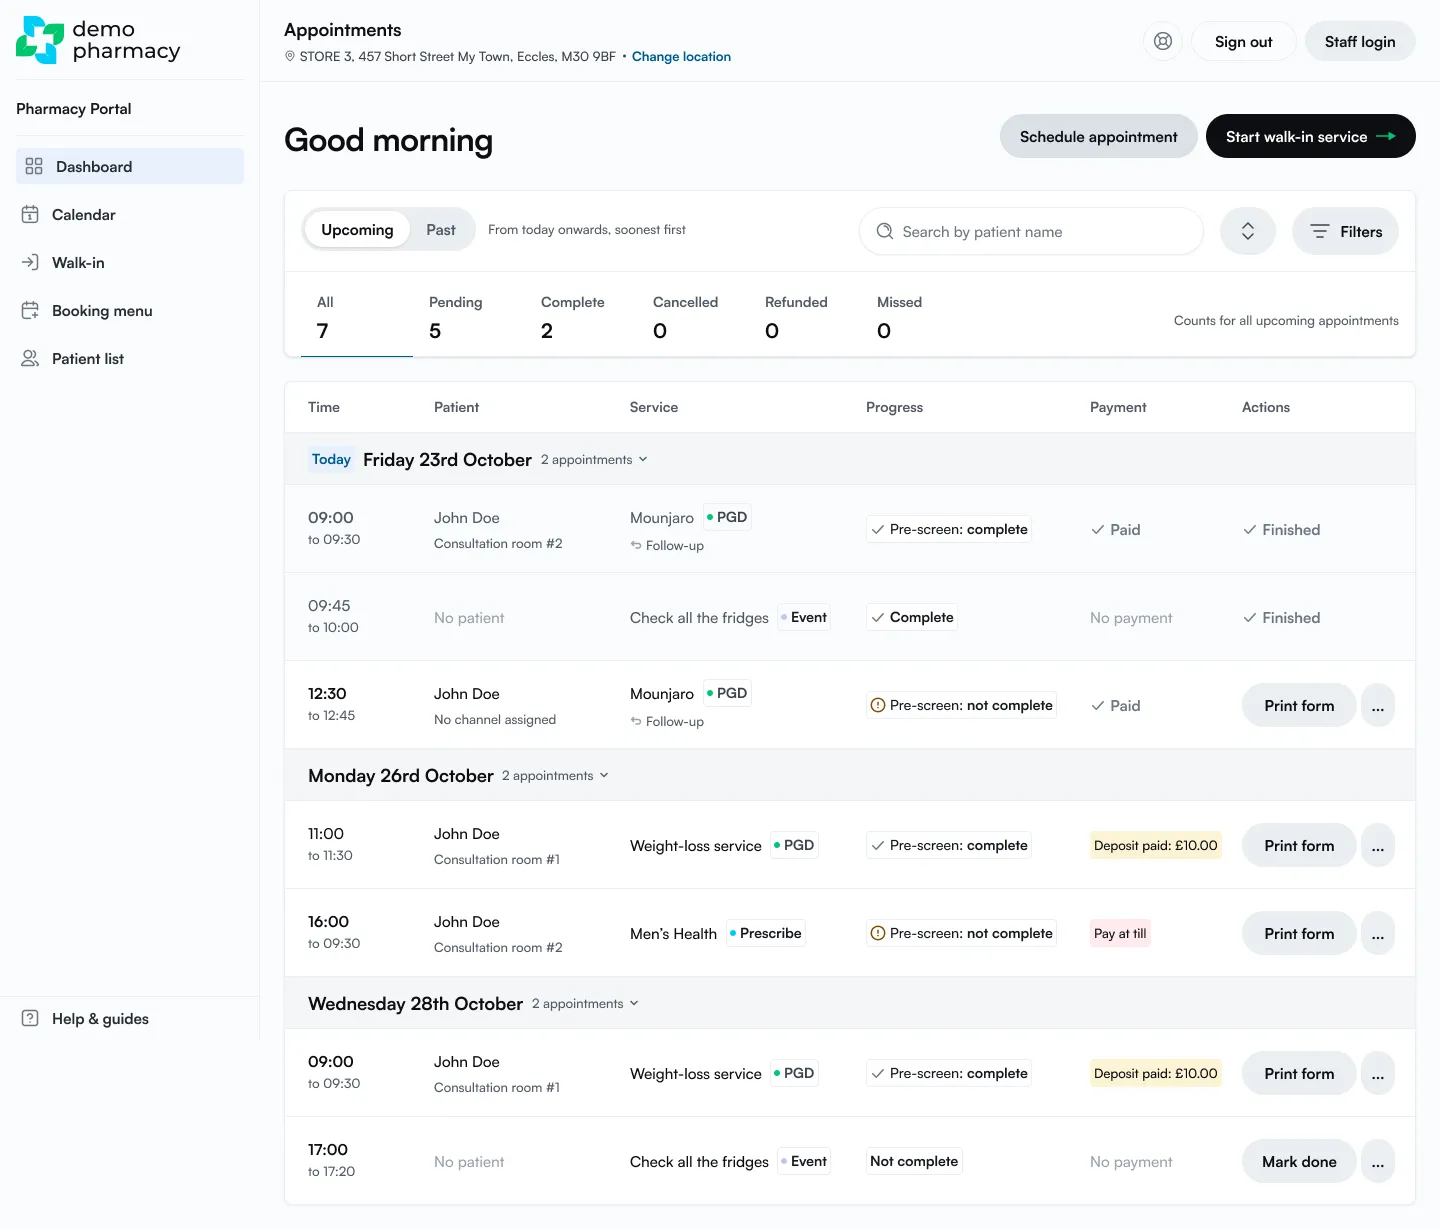
The Pharmacy Portal allows staff to schedule appointments quickly for patients booking a future slot in person at the counter, or for patients calling the pharmacy over the phone. You can configure your calendar to chanage availabilty and limit services.
Sign in to your Pharmacy Account at:
Section titled “Sign in to your Pharmacy Account at:”https://deltera.cloud/pharmacy/v2/login/
(Copy and paste in your browser)
Method 1: Booking via the Dashboard
Section titled “Method 1: Booking via the Dashboard”1. Initiating the Booking
Section titled “1. Initiating the Booking”There are two quick ways to start scheduling an appointment from your pharmacist interface:
- From the Dashboard: Click the Schedule appointment button at the top right of the Dashboard.
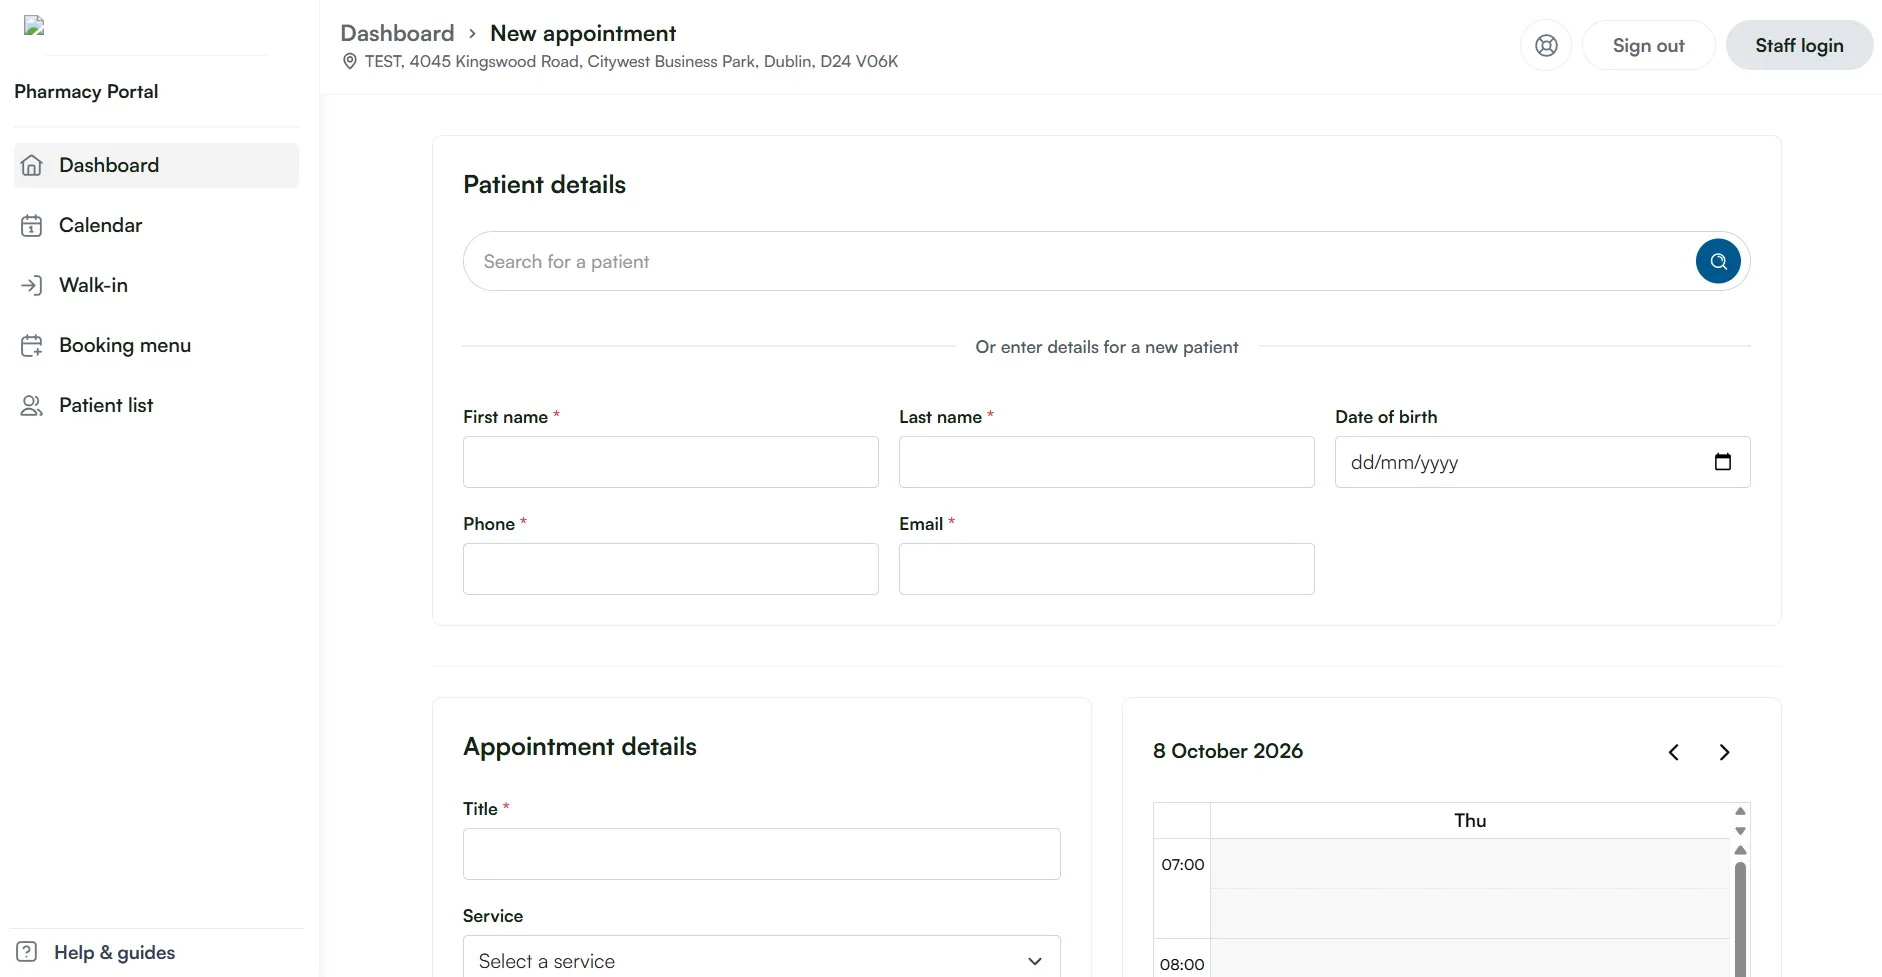
- From the Calendar: Click Calendar in the left-hand menu, then click directly on the specific time slot where you want to place the booking.
2. Patient Information
Section titled “2. Patient Information”Choose one of the following patient entry methods:
Option A: Returning Patients (Recommended)
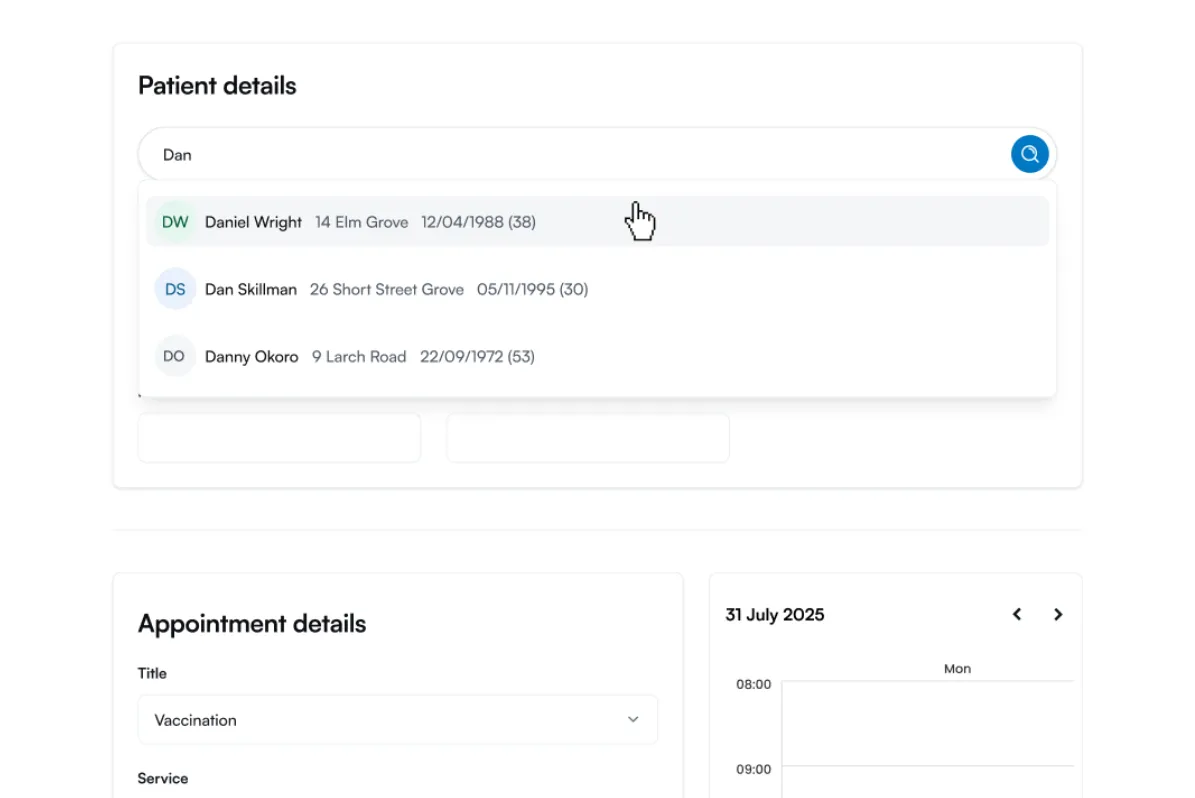
Section titled “Option A: Returning Patients (Recommended)”If the patient has visited your pharmacy previously, search for their name using the search bar. The preview will display their:
- Full Name
- First line of address
- Date of Birth
- Email Address & Phone Number
Verify these details with the patient and select their profile.
⚡ Why Search Past Patients? Searching and selecting an existing patient profile automatically transfers their historical demographic data into the new appointment. This saves significant time during the booking.
Option B: New Patients
Section titled “Option B: New Patients”If the patient is visiting for the first time, manually complete the primary contact fields:
- Full Name
- Date of Birth
- Phone Number
- Email Address
4. Setting Appointment Time & Availability
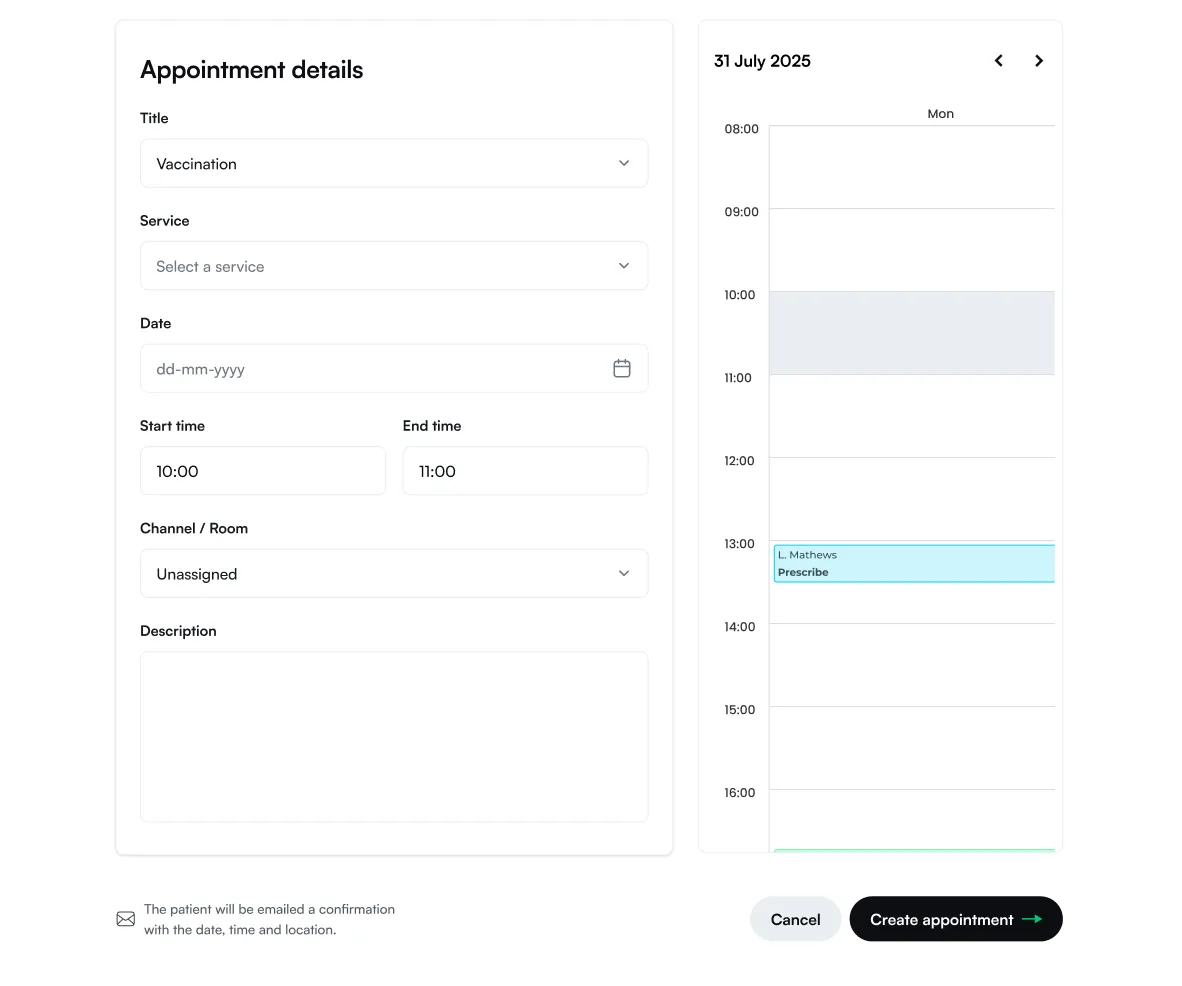
Section titled “4. Setting Appointment Time & Availability”- Complete the core appointment fields, including the service type and date.
- Use the Calendar Preview panel on the right-hand side of the screen to view live branch availability.
- Click directly on an available time slot within the preview panel to set the start time automatically.
5. Finalising the Appointment
Section titled “5. Finalising the Appointment”- Review all appointment and patient details for accuracy.
- Click Create Appointment.
Once created, the appointment instantly populates on your branch schedule. The system automatically sends an email confirmation to the patient containing their booking details and a secure link to complete their digital medical pre-screen prior to their visit.
Method 2: Booking Directly via the Calendar
Section titled “Method 2: Booking Directly via the Calendar”If you are already reviewing the daily or weekly schedule, you can initiate a booking straight from the calendar view:
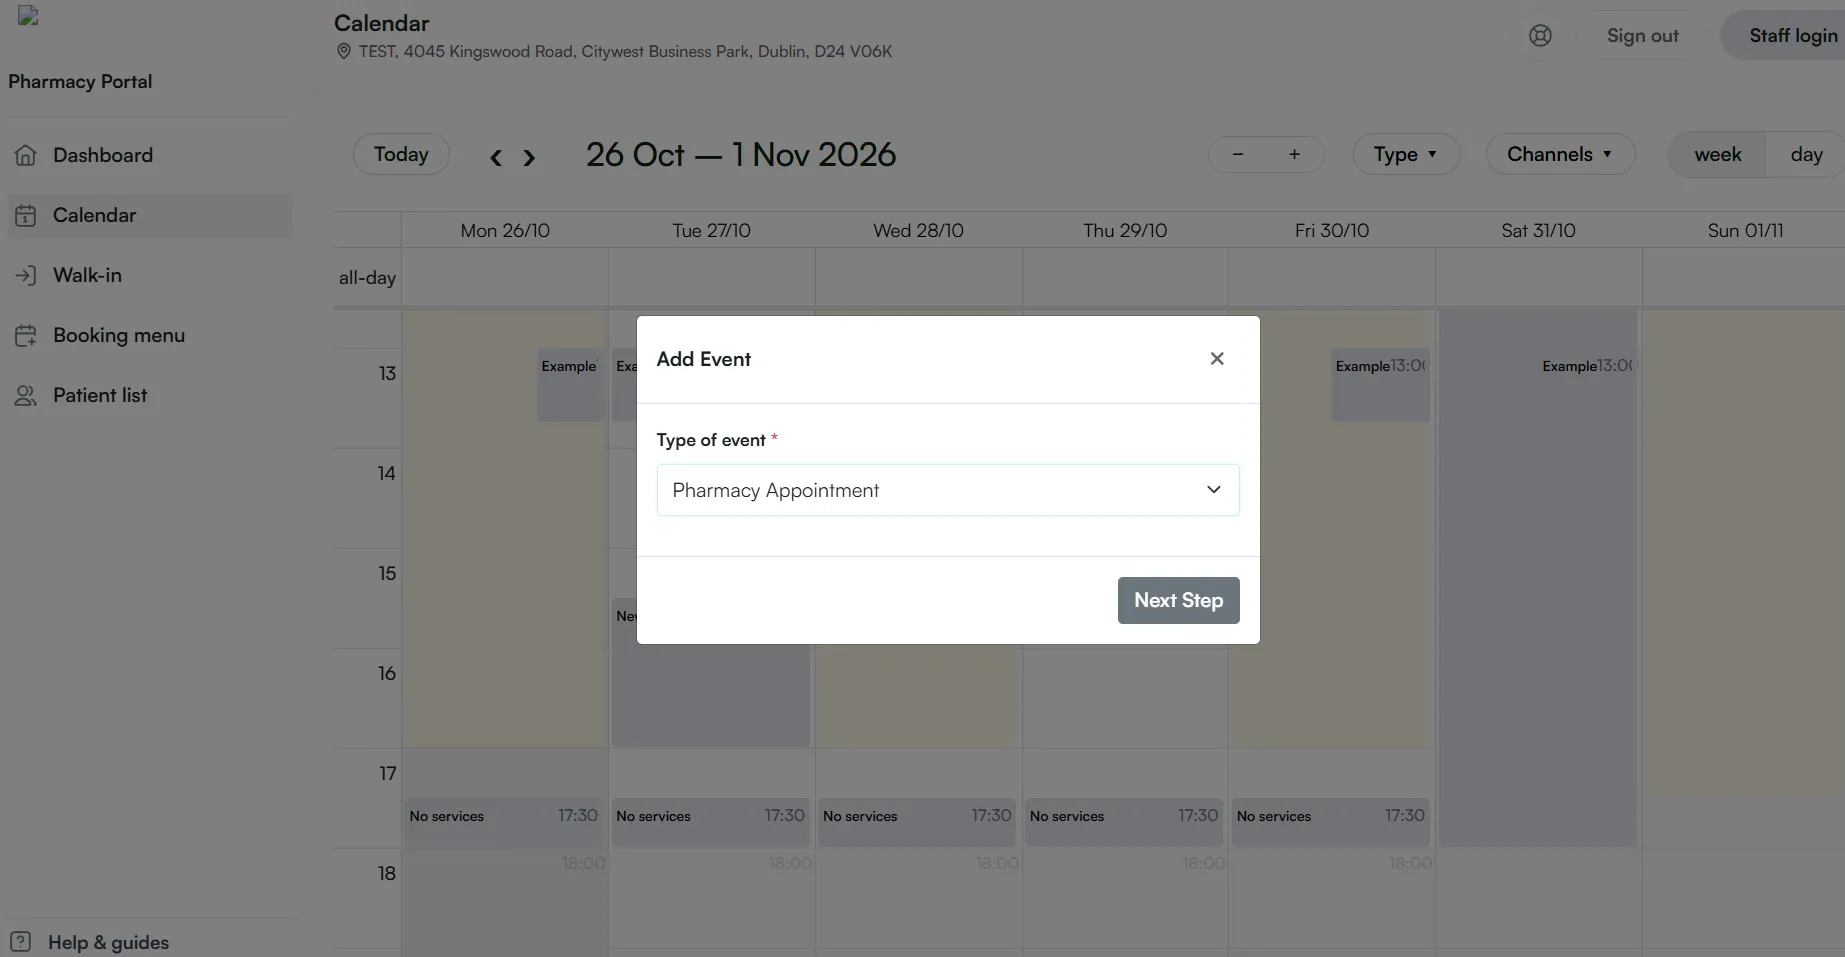
Refining Availability: Breaks & Limited Services
Section titled “Refining Availability: Breaks & Limited Services”By left-clicking on any available time slot in the Appointment Calendar, you can manage your daily capacity beyond your standard opening hours.
Break Events
Section titled “Break Events”Booking a Break (e.g. for a lunch hour or staff meeting) acts as a total block. It prevents any service from being booked in that specific time slot.
Limited Services (Staff Rotas)
Section titled “Limited Services (Staff Rotas)”This tool allows you to control exactly which services are available during specific times. You can create recurring events (with an optional end date) to align the system with your pharmacist rota.
- Example Scenario: If a specific pharmacist works every Friday but only provides Weight Management services, you can create a Limited Services event for that day.
- By selecting only the Weight Management service, you ensure patients cannot book other services (like Travel or Ear Wax Removal) when the qualified clinician is not on-site.
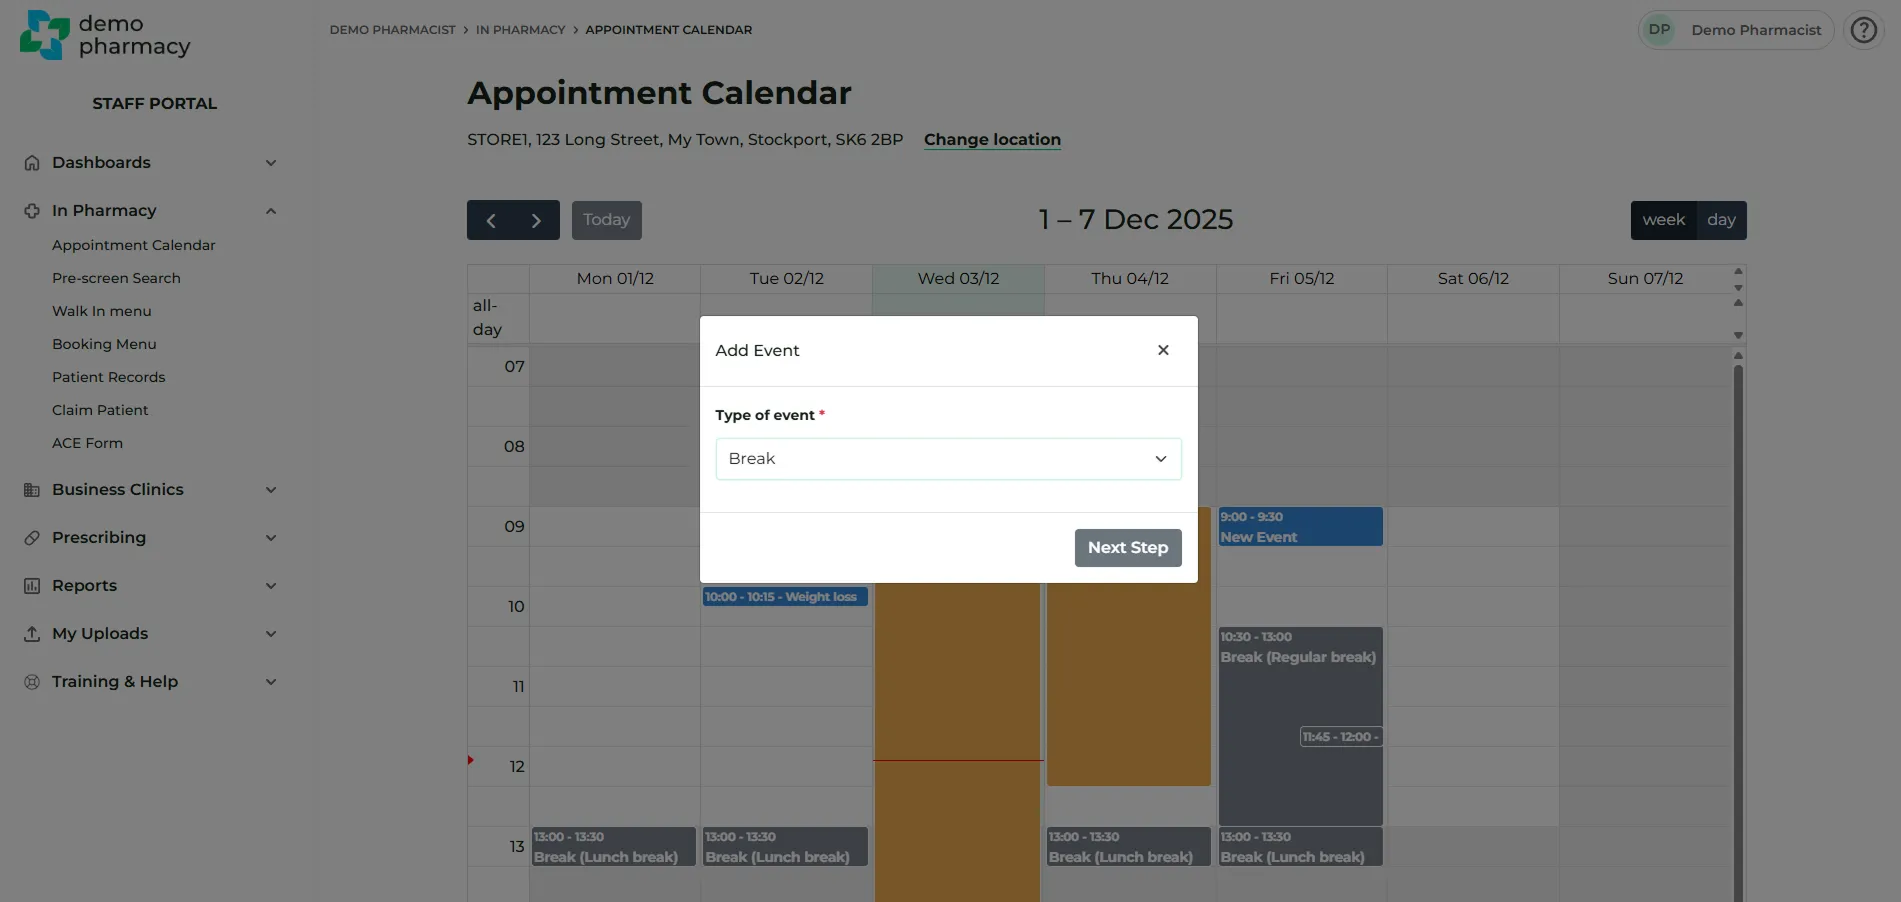
Adding Calendar Events
Section titled “Adding Calendar Events”An event is a calendar entry that isn’t a pharmacy service, such as “Clean the fridges”, “Team meeting” or an informal chat with a patient. Events have no pre-screen and no consultation form.
- Display only: events don’t block patient online booking slots. To stop bookings at a certain time, add a Break instead.
- On the calendar: events show as a pale grey-blue block. No emails or reminders are sent.
- On the Dashboard: events appear in the list with an Event tag. Click Mark done when the event is finished.
Adding an Event
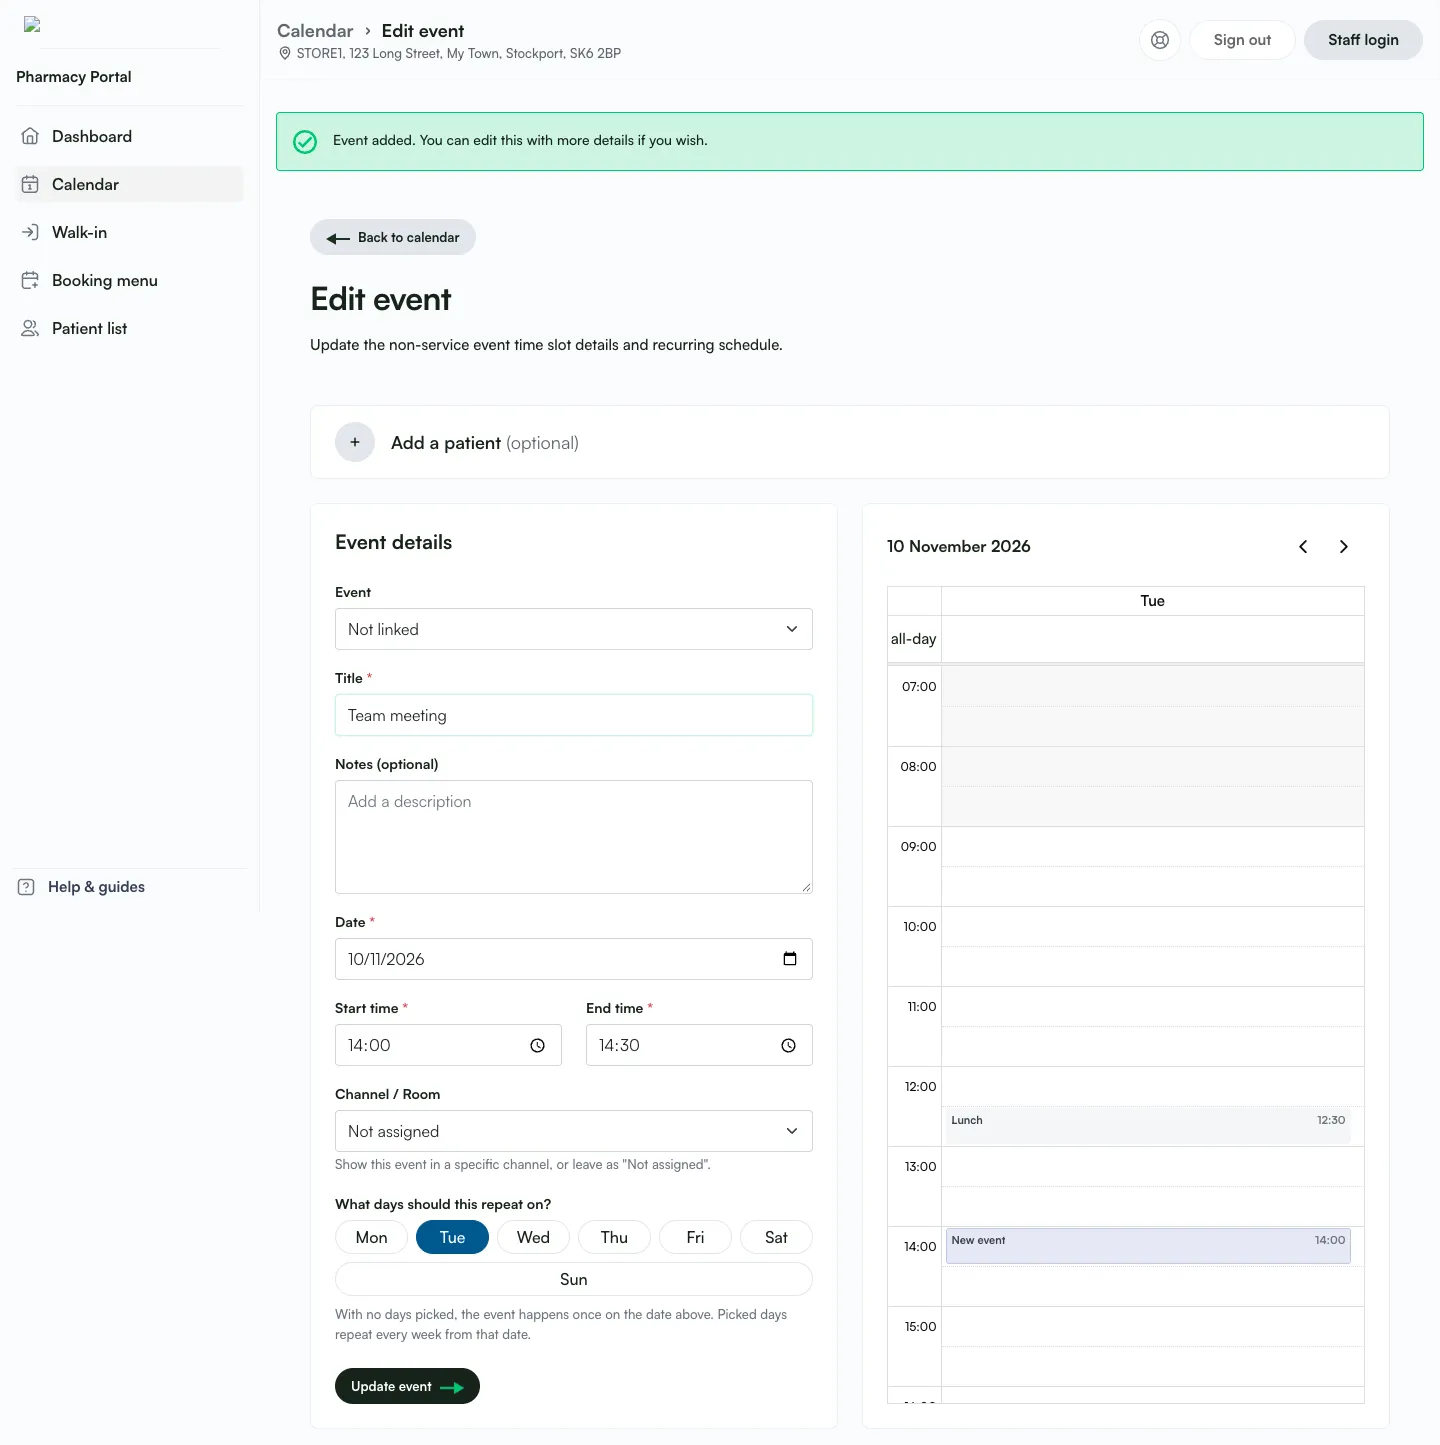
Section titled “Adding an Event”- From the calendar: go to Calendar and click a time slot. In the Add Event dialog, choose Event under Type of event and click Next Step. This creates a 30-minute event called “New Event” and opens the Edit event page. Fill in the details and click Update event.
- From the Booking menu: go to Booking menu. The Event section lists your group’s event types. Click Schedule event to open the Add event page with that event already filled in, then click Add event. If the section shows “No events added yet”, your Head Office hasn’t added any, but you can still add an event from the calendar.
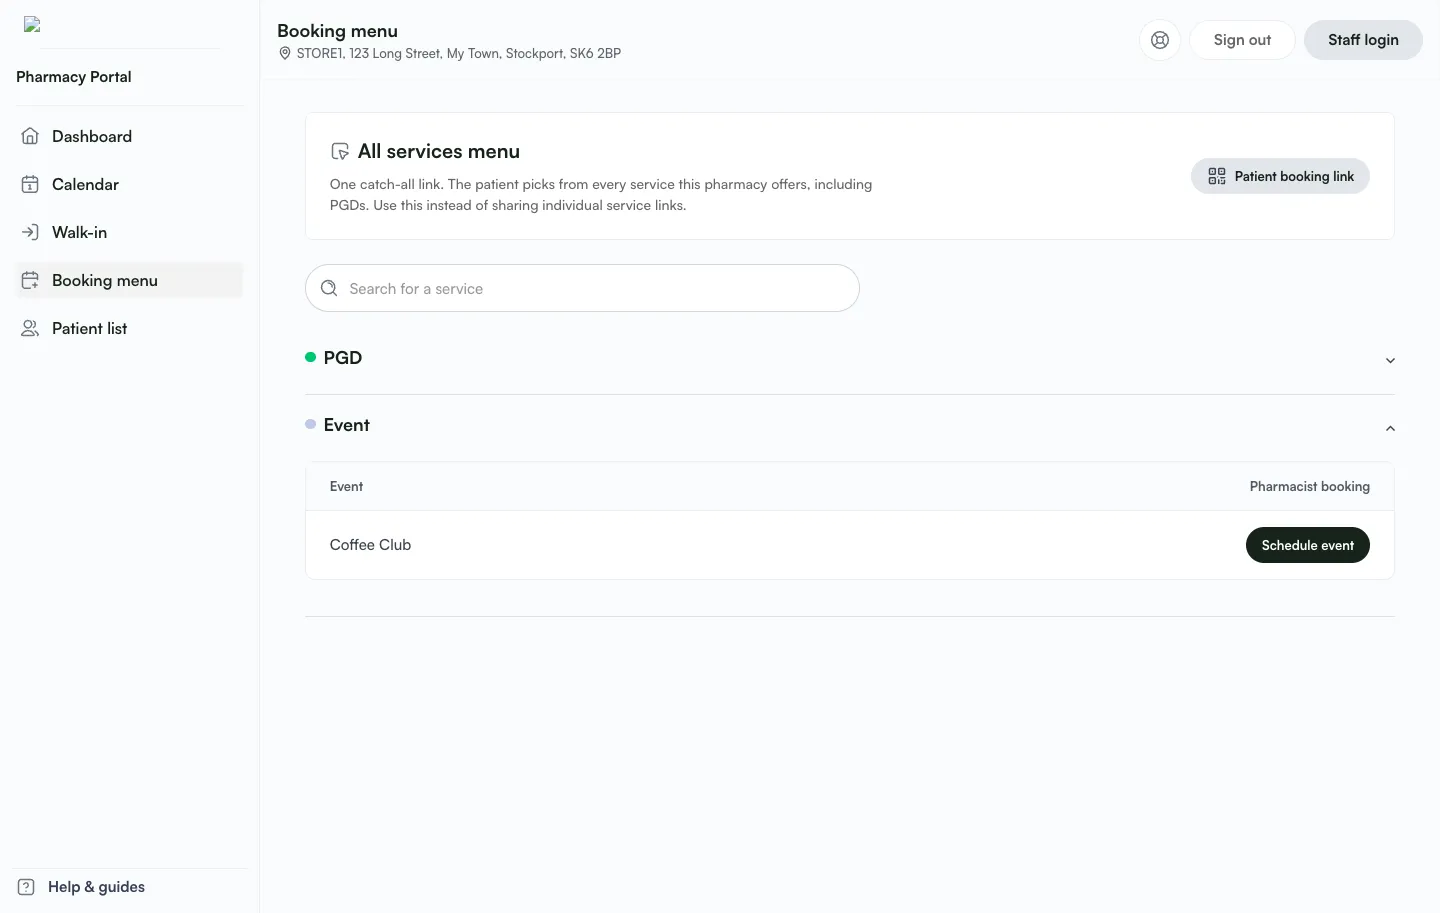
Event Details
Section titled “Event Details”- Event: optional. Pick one of your Head Office’s event types, or leave it as Not linked.
- Title: required.
- Notes (optional)
- Date, Start time and End time: the end time must be after the start time. You can also click or drag on the day calendar beside the form.
- Channel / Room
- What days should this repeat on?: pick one or more days to repeat the event every week. There is no end date, so the event repeats until you edit or delete it.
- Add a patient (optional): search for an existing patient or enter their name, date of birth, phone and email. This is saved on the event only and doesn’t create a patient record.
Completing, Editing and Removing Events
Section titled “Completing, Editing and Removing Events”- For a one-off event with a patient, click the event on the calendar and choose Mark as complete or Mark as missed. No “please rebook” email is sent to the patient.
- To edit or delete an event, click it on the calendar and use the edit (pencil) or delete (bin) icon in the popup.
- To show or hide events, use the Events option in the calendar’s Type filter.
Editing Appointments
Section titled “Editing Appointments”Appointments created online by patients or scheduled in-branch by store colleagues can be updated or status-managed at any time directly from the Pharmacy Portal.
Accessing Appointment Settings
Section titled “Accessing Appointment Settings”To modify or manage an existing booking:
- Locate the appointment on your Dashboard or within the daily calendar view.
- Click … next to the patient’s appointment.
Available Management Options
Section titled “Available Management Options”The … menu has these actions:
- Preview: Look over the appointment ahead of time.
- Edit: Update the appointment details, such as changing the scheduled date or time, selecting a different service, or correcting the patient’s contact details.
- Mark as Missed: Flag the booking as a “Did Not Attend” if the patient fails to arrive for their scheduled slot without notifying the pharmacy.
- Cancel: Cancel the booking if the patient contacts the pharmacy ahead of time to cancel their appointment.
To cancel every appointment on a day, for example if the pharmacist is off sick, see Cancelling a day’s appointments.